15 Effective Salesforce Flow Debug Strategies

Debugging Salesforce Flows is an essential practice that ensures your automation tools perform optimally and reliably. In complex Salesforce environments, where automated processes play a critical role in managing data and interactions, any malfunction can lead to significant disruptions. Effective debugging helps not only in identifying and fixing errors but also in optimizing flow performance, reducing resource consumption, and improving user experience. The command on debug is not just a tool; it’s a mindset. It’s what separates a good flow builder from a great one, inspiring you to strive for excellence in your software development.
By diligently debugging Salesforce Flows, administrators and developers can prevent data inconsistencies, enhance system stability, and deliver a seamless operational workflow. This proactive approach to debugging not only saves time and costs in the long run but also safeguards the integrity of business processes, making it a cornerstone of successful Salesforce implementation.
During Build Phase
1) Debug your flow immediately after you save a meaningful version
When you build a big flow, your debug log will get crowded. Debug meaningful parts of your build to ensure it works as expected before it gets too complicated.

2) Aim for 100% test coverage
Your test scenarios should go down all the flow paths so that you can ensure everything works as expected. Remember that if it makes sense, you can bypass the record-triggered flow start element conditions for some test scenarios and test that separately. For scheduled paths and async paths, you will see a pulldown that allows you to choose which path to debug in your run. You can test these paths only one at a time.
3) Do not reuse old records
Create new records that suit your test scenarios. Inspect them carefully to ensure no field values will interfere with your testing. Old records can have disallowed field value combinations because they were created before recent automation and validations were activated.
4) Look for stop signs and the highlighted path
Your first check is to ensure you don’t see a stop sign and that the path followed is highlighted all the way to the end. You can also check whether you see the word triggered for record-triggered flows.
5) If you see a stop sign
Inspect the debug log, inspect your test data, and fix and run the debug again. More on this is provided in the next section.
Testing Phase
6) If you have errors
Your error may tell you precisely what is wrong. In some scenarios, your flow acts like a baby who cannot tell you exactly what is wrong with them: The error message is cryptic. Inspect the debug log and review the message. Review the values for the element that has the error, the previous element, and referred resource values. If you can not find the issue, start from the top and read your debug log like a book. Hint: values are very important.
7) If you have a get in your flow
Check that your get element produced result(s). You will see the word success in the debug log. That is what you are looking for.
8) If you have a loop in your flow
Your loop element will show you how many items you have in your collection. Check the number. Go through iterations. Your iteration numbers will start at 0. If you use a counter variable, your loop iteration will show 0 when your counter is 1. For a collection of 3 items, your last iteration will be numbered 2. If you follow best practices, you create/update/delete (DML) outside the loop. Your actions inside the loop may cause an error at that point; check the iterations.
9) If you create a record (records)
If you create a record (or records) using a record variable (or a collection), your variable cannot have a recordId values. The recordId will be assigned by the create element when the record is created. You will see an error if you feed a recordId to a create element.
10) If you update a record (records)
If you update a record (or records) using a record variable (or a collection), your variable must have a recordId value. You will see an error if you feed a recordId to a create element.
11) Activate your flow and test in the sandbox
At the end of your test, you should activate and test your flow that way. Debugging is good, but testing after activation is more reliable and essential than debugging. Make sure you perform this as the final step. If your flow fails an fault email has been sent out. Inspect that. Check the next section for more on this topic.
12) If this is a schedule-triggered flow
Remember to test your flow by pointing it to multiple chosen test records (new in Summer 24).
Production Phase
13) Test your flow in production before use
If a final adjustment is necessary after your deployment to production, complete these steps. Debug, test, and activate. Trigger the flow with test data if possible.
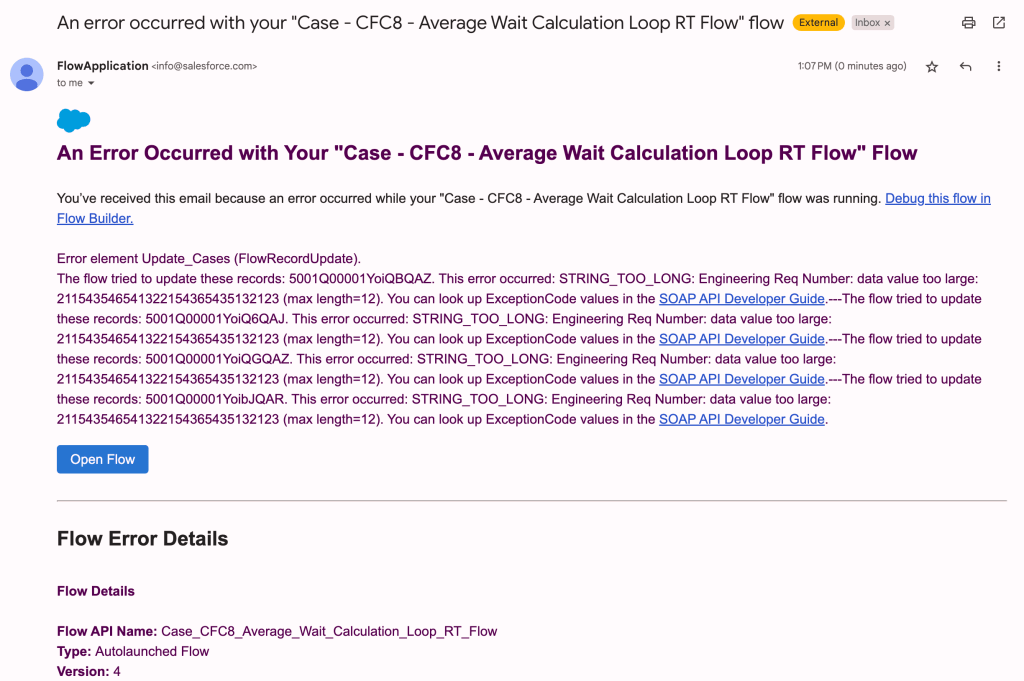
14) If the flow fails in production
A fault email has been sent out. Inspect the email. Your email has a link to your flow. You can open the flow in the flow canvas using this link. Most emails have a link to the failed flow interview. You can open your failed flow interview that shows the stop sign and the debug log. Before you do that inspect the error message on top of the email. Is it clear what went wrong? If not scroll all the way down and inspect the failing element there. There could be additional useful information there. Inspect the element before. Then all the resource references. Then read the debug log like a book, or go to the failed flow interview and do it there.
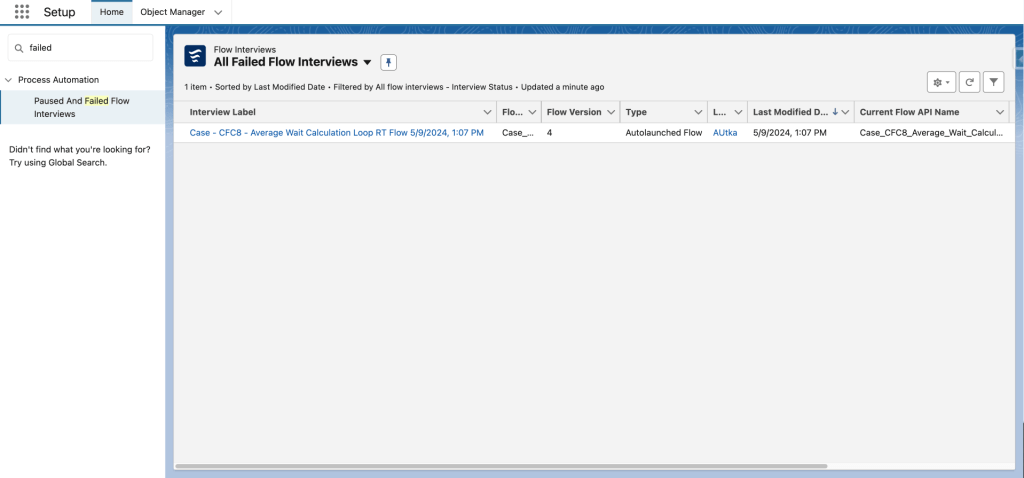
15) Failed flow interviews
If your flow did not go down a fault path, then you can also go directly to the paused and failed flow interviews screen under setup to see the failed flow interview. This screen has the same link that the fault email provides. If you had a fault path (good for you), then the failed flow interview won’t be on that screen, but the email will be sent out regardless. Note that you cannot delete a flow version before all associated failed flow interviews are deleted.
Master these strategies to become a great flow developer.
Ask your questions in the comments.
Explore related posts:
Flow Trigger Explorer in Spring 22
Top 12 Salesforce Summer 24 Flow Features
How to Use Dynamic Forms for Flow
Four Tips for Leveraging Custom Errors in Flows
Plus, check out a debugging article from Salesforce Ben HERE

4 Comments