Building Agentic RAG: Setting Up Web Crawlers in Data Cloud (Part 1)


AI agents are only as accurate as the data backing them. In fast-moving sectors like aviation, route rosters, schedule changes, and service suspensions update constantly. If your agent relies on outdated knowledge, it risks giving incorrect information and losing customers. Keeping your agent grounded in real-time, accurate data is essential for maintaining trust and reliability.

In this guide, you will learn how to build an end-to-end Agentic RAG pipeline in Salesforce using Data Cloud, Agentforce Studio, and Prompt Builder. You will set up an automated web crawler to ingest dynamic knowledge, transform that raw content into searchable vector chunks, build a custom retriever, and deploy an Agentforce subagent that delivers accurate, grounded responses in real time.
What Is Retrieval-Augmented Generation (RAG) and How Does It Work?
Retrieval-Augmented Generation (RAG) enhances LLM responses by fetching relevant data from external sources before generating an answer. It pairs a retrieval component that searches databases or documents with a generation component that uses that context to produce accurate, up-to-date responses. Grounding models in real-time external data eliminates inaccuracies caused by outdated training sets.
To demonstrate RAG in action, we will act as SFBreak Airlines, a fictional carrier matching easyJet’s route network. The goal is to build an agent that accurately details available destinations by setting up a web crawler connection to scrape and format web page content into usable data.
Prerequisites: Enabling Einstein, Agentforce, and Data Cloud
Einstein, Agentforce and Data 360 (aka Data Cloud) need to be enabled. All are provided for free in newer Development Edition orgs. You can sign up for one here.
Go to Setup → Einstein Setup and Turn on Einstein.


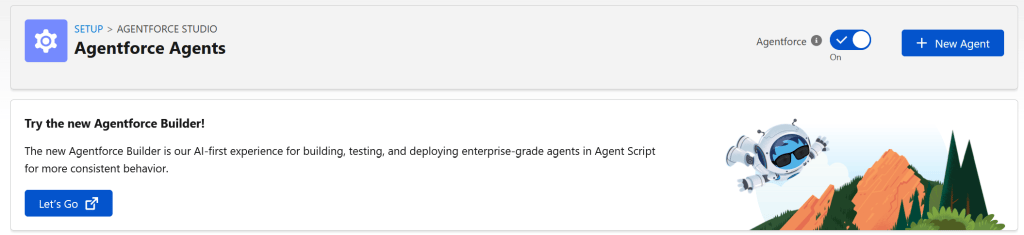
Again, go to Setup → Agentforce Agents and make sure that the Agentforce toggle is on.
Finally, go to Data Cloud Setup (which can be found under the Setup menu) and start setting up your Data Cloud instance. This process can take a few minutes.

Once that’s done, we can conclude that the groundwork is done and start the process.
How to Set Up a Web Content Crawler Connector in Data Cloud
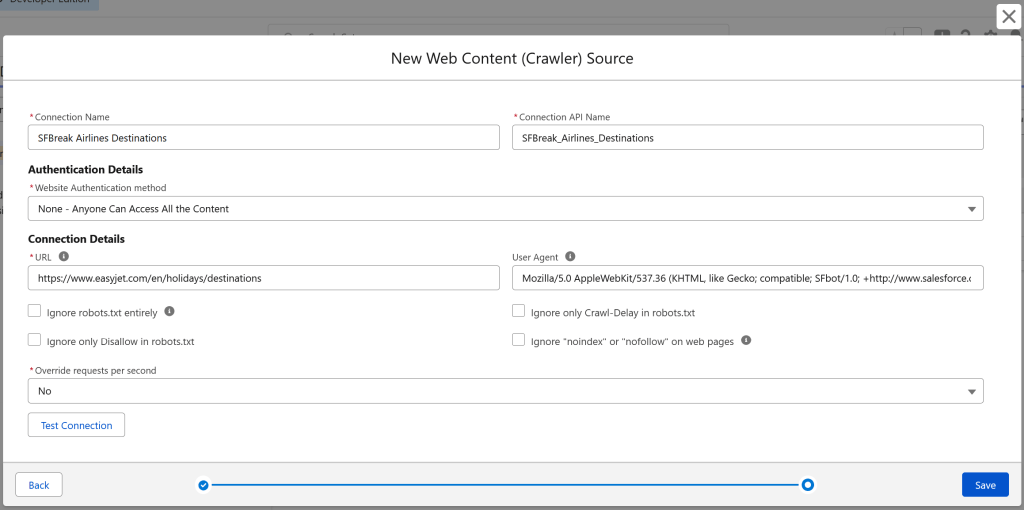
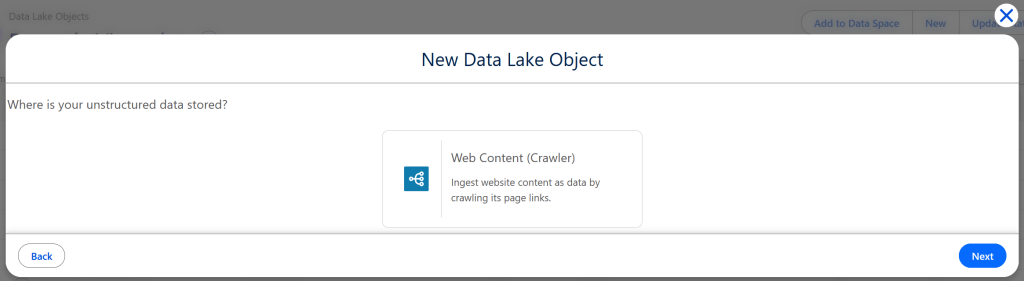
Go to Data Cloud Setup → Other Connectors and click New on the upper right corner. You will be prompted to choose a connector type. Choose Web Content (Crawler).

Click Next and give your connection any distinctive name of your choosing. Make sure that the Website Authentication method is left on “None – Anyone Can Access All the Content”. Enter the URL of the web page from which you want to scrape data to the URL input (it will be the easyJet destinations list in our case). We will address this connection as SFBreak Airlines Destinations. Leave everything else as is and click Save.
Data Cloud may take a few minutes to process the connection, but once complete, you can create your first Data Lake Object (DLO). You only need to establish this connection once, and you can build multiple DLOs from it without reconnecting each time.
Creating a Data Lake Object (DLO) and a Data Model Object (DMO)
Open App Launcher and navigate to Data Lake Objects, either from App Launcher itself or through the Data Cloud app. Click New, select From External Files, and then click Next.

Select Web Content (Crawler) and proceed.
Configuring Data Lake Object (DLO) Crawl Depth and CSS Selectors
For the details of your DLO i.e. which content to crawl through:
- Connection should be set to the connection you just created (SFBreak Airlines Destinations in our case)
- Crawl Depth should be set to 0. Crawl Depth sets how many layers of URLs the crawler will follow on the web page i.e. if it will click the existing URLs or not. In our case, the URLs on the destinations lead to what their main attractions are, which is irrelevant to our use case. To keep things simple, our ideal crawl depth is 0, i.e. the crawler will only scan the main page. (If crawl depth is 1 or more, you can also limit the pages ingested using a regular expression filter defined in the Included Web Pages field. Our crawl depth is 0, therefore this is not relevant for us.)
- Included Page Element is an optional field which we will fill for now, since we only want the destination list and nothing else.
How to Target Specific Web Elements Using CSS Selectors in Data Cloud
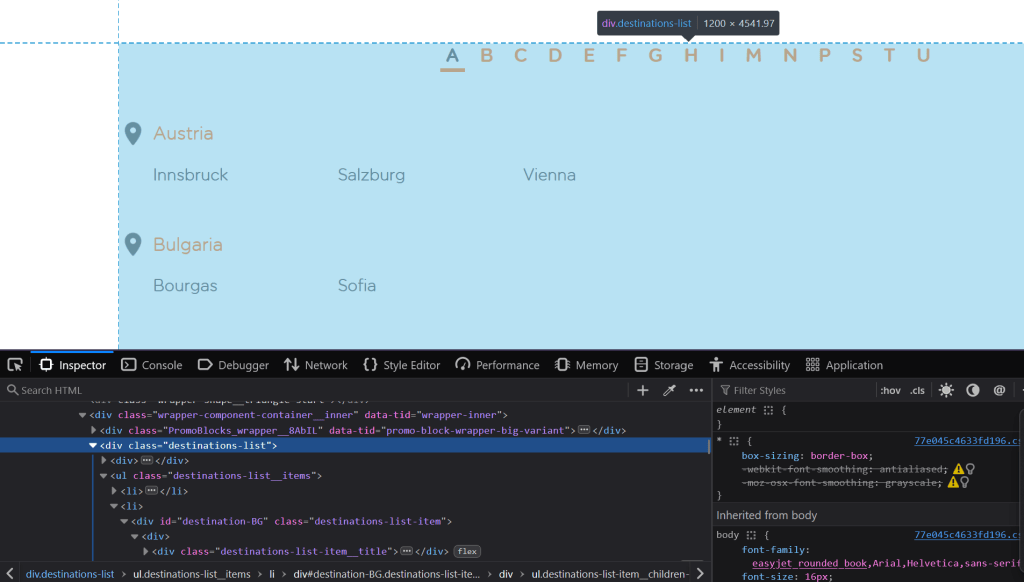
For the Included Page Element field, let’s go back to the destination list webpage. We want to target specific content here, which is the destination list. So, instead of ingesting the entire page, we want our crawler to only take the list and leave the others. We will achieve this by feeding it the CSS selector we want it to ingest. To find the right CSS selector:
- Right click the page and open Inspect.
- In the Inspector panel (or Elements panel), right click the class at the highest level that contains your content and does not contain anything else. Click Copy → CSS Selector. In our case, this class will be .destinations-list.
- Paste it to the Included Page Element input box.
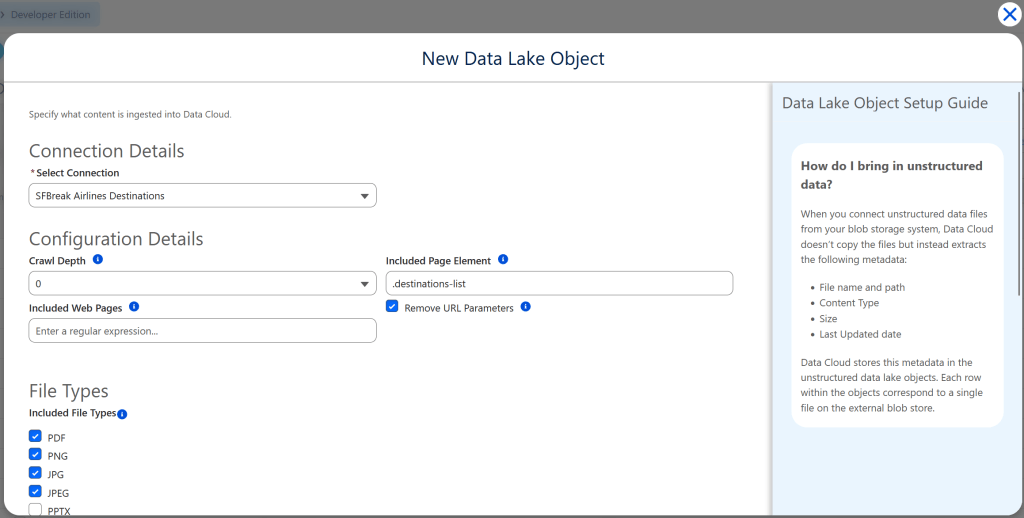
Leave File Types and Page Elements as is, since these only help you when you want to target specific parts of the content you just happened to filter for the specific parts you want. Click Next.
The next screen will let you configure the details for the resulting Unstructured Data Model Object (UDMO). Select the relevant data space, give it a distinctive name of your choosing and click Next.

The next menu will ask you to configure your search indexes. Make sure that Enable semantic search with system defaults checkbox is ticked, give the search index name an appropriate and distinctive name of your choosing.
Neither CLIP embedding model nor unstructured knowledge harmonization is relevant for our use case. CLIP embedding model is for when your grounding data contains images which need to be searchable. Knowledge harmonization is the process of converting diverse documents into a unified format. We do not need either. Click Save.

How to Query and Test Vectorized Data in Data Cloud Explorer
Take a moment to review your progress and verify your data before moving on. Testing is a crucial part of the process.
- We have successfully created a connection between Data 360 and the data we want to fetch.
- We have set up a crawler so that this fetching process would be done automatically, without our intervention.
- We have created a DLO and its corresponding DMO so that this data could be easily ingested by our agent.
- The data has been vectorized and chunked. The chunks will (hopefully) contain the data we want our agent to ingest.
Go to Data Cloud app → Data Explorer. In the Object picklist, select Data Model Object and then query for the chunk objects of the DMO you just created. In our case, it will be “SFBreak Airlines Destinations chunk”.

Inspecting Vector Chunk Results via Data Explorer and SOQL
There is only one chunk, but it contains all your target data. Notice the inclusion of “Austria” in the text. Looking closer, you can see this captures the entire HTML element specified during DLO creation.
You can also test this with Query Builder. Open Web Console and run the “SFDX: Create Query in SOQL Builder” command, or open a SOQL query editor from any IDE of your choosing. Afterwards, run the query below, replacing SFBreak_Airlines_Destinations_chunk__dlm with the API name of your chunk object which should always end with the suffix __dlm. It should yield the same result.
SELECT FIELDS(ALL) FROM SFBreak_Airlines_Destinations_chunk__dlm LIMIT 100
We can confirm that we got what we wanted. Let’s shake off the turbulence and proceed.
We have successfully established our data foundation in Data Cloud by setting up a live Web Content Crawler connection, creating a Data Lake Object (DLO) with CSS selector filtering, establishing a Data Model Object (DMO), and vectorizing our destination data into searchable chunks.
Now that our grounding data is ready, it’s time to connect it to the intelligence layer.
👉 Click here to read Part 2: Building Agentic RAG: Connecting Data Cloud to Agentforce Studio, where we will build a custom retriever, create a dynamic Flex Prompt Template, and deploy an Agentforce subagent to answer user queries in real time.
Explore related content:
Salesforce AI Guardrails: An Admin’s Guide to Permissions, FLS, & Agentforce
Stop Treating Flow Like Apex: 5 Mistakes New Developers Make
Architectural Decisions in the AI Era: Flow, Apex, and Agentforce